Ten Minute Tortilla Pizza

Originally posted on my old blog Where’s My Parade?! April 2012.
Spotted on the Tesco Real Food site, I couldn’t wait to give Tortilla Pizzas a go.
Who doesn’t love pizza, right?! We don’t like the love handles though, BOOO!
Rocking in at just over 400 calories a serving, this is a great compromise. It really is all the flavour, with a helluva lot less time needed to work it off after.
You might think that you’d need a second tortilla, but the toppings are rich and filling, so you’ll have more than enough going on with the one serving.
It is incredibly simple and cheap to make, and of course, hugely adaptable to your preferred toppings.
Perfect mid-week comfort food, and easy on the waistline!
Quick, cheap and easy.
You are what you eat, wha’!

Black Forest Cheesecake

Edited and re-posted from my old blog Where’s My Parade?!
Originally posted June 2012.
Recipe taken from here.
- 250g plain chocolate biscuits
- 125g butter, melted
- 3 teaspoons gelatine
- ½ cup (125ml) water
- 250g packet cream cheese, softened
- ¾ cup (165g) caster sugar
- 1 tablespoon lemon juice
- 300ml thickened cream
- 425g can pitted black cherries
- topping
- 1 tablespoon cornflour
- 1 tablespoon caster sugar
- 1 tablespoon Cointreau or Grand Marnier
Blend or process biscuits until mixture resembles fine breadcrumbs. Add butter; process until combined. Press biscuit mixture evenly over base and side of a 20cm spring form tin, place on oven tray; refrigerate for about 30 minutes or until firm.
Meanwhile, sprinkle gelatine over the water in a small heatproof jug; stand jug in small saucepan of simmering water. Stir until gelatine dissolves; cool 5 minutes.
Beat cream cheese, sugar and juice in a small bowl with an electric mixer until smooth; transfer to a large bowl.
Whip cream until soft peaks form, fold into cheese mixture in two batches; fold in gelatine mixture. Drain cherries over a bowl, reserve ¾ cup of the syrup for the topping.
…the next part of the recipe says to pat half the cherries dry on absorbent paper. Don’t bother. I lost the will doing this. The juice might bleed into the cheese mix so perhaps pat them all together between a couple of kitchen roll sheets to take the worst off. I, ridiculously, patted each one dry, one by one…
The original recipe states you will need half the cherries for this recipe but lob as many as you want in. I think you could’ve gotten away with using nearly all of them. You can see I put some on the top, which ruins the smooth glossy effect, but sure, ’tis far from sleek line cheesecakes I was reared.
Spoon 1/3 of cheese mixture into crumb crust, top with half of the reserved cherries; repeat layering, ending with cheese mixture. Refrigerate until just firm.
Topping
Combine the cornflour and sugar with reserved cherry syrup in a small saucepan. Stir over heat until the mixture boils and thickens, stir in Cointreau; cool 10 minutes.
Spread Topping over cheesecake. Refrigerate cheesecake overnight
Do not serve just out of the fridge. It loses all flavour when too cool.
Look at the picture on the link-so smooth, glossy and chic looking. Ahem…mine obviously turned out a bit more down-home style looking….
It’s a handy alternative to the monster Black Forest Gateaux cake, and certainly lighter in weight and taste. Seriously, that cake is mahoosive.

Sorta, Kinda, Traditional Paella Valenciana

Traditional Paella Valenciana uses rabbit, chicken and snails. The snails can be optional, whereas the other meats are a must for it to be traditional. As you can see from the top photo, I lobbed in chorizo in case the rest was inedible. Not traditional, but on my first attempt I lost the run of myself by the end.
Rabbit isn’t that hard to source. You can order it online from James Whelan butchers, although it’s a tad pricey. I pre-ordered mine from F.X Buckley’s who defrosted one for me, and charged €8.99. Wanting to stick to the traditional recipe, I intended to make stock from the rabbit carcass. I’d looked up how to joint a rabbit on YouTube. Slightly obsessed with jointing stuff now.
On the day, I was way too hungover to start hacking at a skinned Bugs, so the butcher did the necessary. It was all done in about ten seconds. Very impressive work, and quite likely saved me from wrecking a knife or two at home.
There isn’t a huge amount of meat on a 1 lb rabbit, so most of what you see below went into the pot to make the stock.

The stock is just the rabbit carcass brought to the boil, a chopped onion, two small carrots, a celery rib and some parsley added and then left to simmer for an hour on a medium-low heat.
I researched the most traditional of traditional recipes and picked Spanish brains for tips in order to do it right. Despite all my research, I ended up working off a badly written method found online.
Stuff was burnt, stock yield was poor, and I wandered from the traditional Valencian ingredients in order to try and make it palateable. It was what the Spanish would call El Grando Pain In The Culo. I spent the first 45 mins knowing it was not working and was pretty much….
But, as there were mouths to be fed and I’m a stubborn wagon who can’t see food go to waste (even if it might end up as total muck) I saw it through.
I’ve since made it a few times and it is essentially a very easy dish to prep and cook. Here’s what works for me.
Serves 6, using a 38cm/ 15 in pan
Ingredients
420g white beans (I used butter beans)
3 medium tomatoes, diced
1 whole onion, diced
6 chicken drumsticks
1lb rabbit, skinned and jointed
18 snails, cleaned and prepped (optional)
8 artichoke halves
4 handfuls green beans
A pinch of saffron
3-4 cloves of garlic, finely chopped
Olive oil
I used roughly 1.5 lt of chicken stock from cubes and two fingers depth of the rabbit stock that was left. It’s best to keep an eye on it and top up with a little extra stock or water as it cooks, depending on your pan.
Good pinch of saffron
400g paella rice, although arborio works just fine.
Not traditional but I chuck it in-
Half a red bell pepper, diced small. You could throw the whole lot in or use the remainder for decorative strips on the top.
Two chicken stock cubes, dissolved
Chorizo, cuz it’s purdy and tasty
If you want to make rabbit stock, give yourself about 2-3 hours prior to wanting to start your paella. It would be better to do it the day ahead. Also, if you follow the instructions for stock above, use a massive pot and a ton of water to ensure the liquid doesn’t disappear.
Stock. Where you going. Stock. Staaaahp.

Method
Pan fry the rabbit and chicken with enough olive oil to stop it sticking, turning the meat as needed for about 15 minutes.
Make up your stock and stir in the saffron.
Remove the meat temporarily after the 15 mins, and add in the onion, garlic, tomato.
I added half a small diced red pepper as I half wanted to make Sofrito, not traditional as far as I’m aware but a tip from a fabulous Spanish friend.
So, either make the sofrito and add it in once the meat has had it’s cooking time, or remove the meat and gently sauté the onion, garlic and tomato in some more olive oil. When the onions are softened/ slightly translucent, return the meat to the pan, with the snails if you’re using them, and add the beans (drained, if from a tin).
If the pan is looking a bit dry, top up with a bit of olive oil before adding the rice.
Add your rice and mix all the pan contents quickly. Add the stock/saffron mix. I initially poured in just under a litre of stock mix, and then topped it up during the hour with another half a litre or so as it needed. It’ll depend on your pan, mine is quite shallow (and judgy, what a bitch) so keep an eye on it.
Add the artichoke quarters around the top of the mix.
Top with about four handfuls of green beans. I used frozen, straight from the packet and it worked just dandy.
Of course, I topped it with chorizo, just to give the traditional ship that had long sailed the saffron stained finger.
Give it an hour once you have everything in the pan.
It tastes like paella should, or from my travels it’s up there with the paellas I’ve experienced.
Rabbit meat or stock is not necessary for a tasty paella but it adds that extra oomph and if you manage to have any stock left over for another dish, it’s a bonus.
Tortilla de Patata

6 medium potatoes
1 large white onion
6 large eggs
2-3 cups of olive oil
Salt to taste
Optional:
Half a red pepper, diced small
Chorizo, chopped into small pieces
Spinach, herbs
Peel your spuds and onion.
Chop your onion into small to medium sized chunks. Put into a large bowl.
I read that you shouldn’t use a food processer to slice the potatoes as they’ll be too thin, but it was fine. Anything for an easy life, me. Plus the potato slices fried up quicker, hurrah!
Add the potatoes into the bowl with the onion and mix well.Salt the mix and give it another mix to disribute.
Heat the olive oil in a large frying pan, and add the potato and onions. I found that the potatoes and onion cooked nicely sitting in the oil, no need to have them floating in it, just enough to move them around easily. Even my bigest pan didn’t take the full amount of the mix in one go, so it may be easier to split the batch in two and fry seperately to ensure an even cooking time.
When the potato slices can be split easily with a spatula, you can take them out of the oil and into a large bowl. Drain the oil off seperately and save a small amount to use for the final fry off.

In a medium bowl, whisk the six eggs together. When the potato mix has cooled slightly, add the eggs to it and mix well. If you’re adding anything extra such as a bell pepper or chorizo, mix it in now.

Return about 2 tablespoons of oil to your pan, on a medium heat. Make sure it’s not any more than this or it’ll cook the bottom side too quickly. For this part, I used a 10 inch frying pan, which fit the mix perfectly.
Lift the edge up with a spatula to see how the bottom is browning. When it’s a golden brown, it’s ready to turn. Everyone seems to get a squeaky bum about this part but it’s no bother once you have a proper size plate and do it over the sink.
Turn the heat off and carry the pan to the sink. Place a large plate over the pan, so you can turn the tortilla out onto it. With one hand firmly over the base of the plate and your other hand holding the pan handle, flip the plate and pan. There may be a bit of runny oil or egg bit that escapes out the side (which is why it’s done over the sink), but the tortilla will be grand.
Put the pan back on the hob, add a little bit of oil to cover the base and put on a medium heat again for about 20 seconds. Gently slide the tortilla back onto the pan with a spatula. Again, there may be a little bit of runny bits, but just scoot that on into the pan. Shape the tortilla edge with your spatula and leave to gently cook for five minutes. If it needs an extra minute or so, leave it. Turn ff the heat and leave sit for a few minutes before transferring onto a suitable sized plate.

It’ll serve 4-6 as part of a main dish, or roughly 20 appetizer squares.
I serve it usually as how I saw it in Havana Tapas on Georges Street once, which is a disc of baguette, topped with a tortilla square, a fold of jamon (or prosciutto or parma since that seems easier to get hold of) and an olive kept in place with a cocktail stick.
Surprisingly, despite eating my body weight in it the last time I made it, there was a good bit left over for snacking and bulking up work lunch salads. If nothing else, it’s great to have around to chew on while standing in the kitchen deciding what you’re going to eat next.
Essential thinking noms FTW!

(gif: reactiongifs.com)
Baja Garlic Prawns with Coriander and Lime Rice

Edited and re-posted from my old blog Where’s My Parade?!
First posted July 2013.
After a first time trip to Cortina’s in Dundrum Town Centre last week, I got a little obsessed with their cilantro and lime rice. I could eat this rice without anything else. Yum, coriander. I dance around with coriander bunches like Morrissey and his gladioli.
Anywho, onto the recipe. Cravings dictated the direction of my rice companion. Garlic and prawns said the belly brain. Lots of garlic. There may or may not have been a plan laugh involved.
Very simple and veeerry tasty. I used Marcela Valladolid’s recipe
Baja Garlic Prawns
For two servings, I used the following-
1 tbsp butter
half pound king prawns
salt and freshly ground pepper
1 white onion diced small
4 garlic cloves
3 tblsp white wine
juice of half a lime
(in lieu of parsley) 2 handfuls of coriander chopped
Directions (from Marcela’s recipe on foodnetwork.com)–
Melt the butter in heavy medium skillet over medium heat. Season the shrimp with salt and pepper, to taste. Cook for about 4 minutes until almost fully cooked. Using a slotted spoon, transfer the shrimp to a plate and tent it with foil. Add the onion and garlic and cook until the onion is translucent, about 6 minutes. Stir in the wine and bring to boil, scraping up the brown bits on the bottom of the pan. Boil for 1 minute. Stir in the lime juice and parsley. Return the shrimp to the pan and toss to coat with sauce and Continue to cook until the shrimp are fully cooked, about 1 minutes.
Coriander and Lime Rice-
Half a cup of rice per person
Double the amount of water to rice (1 cup water per person)
1 teaspoon salt
juice of half a lime per person
2 handfuls of corainder chopped per person
In a suitable sized pot for your portions of rice, add the rice and water. Cook for the time indicated on the package directions.
When the rice is ready, squeeze your lime juice into a large bowl. Add the rice and then the chopped coriander. Mix fully, fluffing the rice with a fork.
Serve with a Margarita or five.

Savoury Panna Cotta with Fig & Walnut Salad

Edited and re-posted from my old blog Where’s My Parade?!
Originally posted May 2012.
With the arrival of proper sunshine this week, my mind wandered to sun holidays of yore, and some great food that I had there. One place I often bore people about is Sardinia. It was supposed to be just a few days away, hit the beach, have some pizza and the like in the evening. I might’ve mentioned it once or twice…or thrice before that it was here that I discover my beloved Cannonau…
Even though Alghero is a pretty touristy place, they have avoided compromising the quality of food served up to pawn off on unsuspecting blow ins. You won’t be short on choice for the freshest fish and seafood, and gelato that would put hairs on your chest and melt them straight off again.
But it turned out to me a very fortuitous trip, food wise, such as the discovery of an incredible Agriturismo a twenty minute drive out of Alghero town.
An agriturismo is a working farm that you can holiday at, with accommodation and meals provided on site. Their appeal for holiday goers is that some will allow you to work in the farm during the day. The owners usually run restaurants open to the public for a set price meal. The one we went to, was an all-you-can-eat deal…but they would never have anyone ask for more. They’re nearly as big a feeder as The Mother, so you’re more likely to turn the large portions away!
The dinner we had in Agriturismo Isidoro, is to this day, the best meal I’ve had in my life. For €30 you are given dish after dish of vegetables, all sorts of pork, pasta, cheese and meat platters, breads, and of course, wine. It seemed never ending, and after each course you’d think that had to be it, how could you possibly manage any more, and yet another plate would arrive out and it would fit in juuuuust fine!
Everything that was put up in front of you had come from the farm, and the farmer would potter out at various stages throughout the evening to check on how we were.
Between my rubbish Italian and his wild hand gestures, we bonded over the cucumber that was so juicy, it tasted like melon.
I could go on about that meal, but the point of all of this is the other discovery from that trip in Sardinia-Figs!
On the way down to the beach in the morning, my friend grabbed a couple of figs off a tree, and handed me one. I’d never seen a fig outside of a pastry biscuit that was labelled ‘Jacob’s’ so wasn’t quite sure to make of it. It looked a little unripe and didn’t want to get done for eating stolen fruit. Of course, being the wild thing that I am, I gave it a go (totes living on the edge), and became figs number one fan.
From then on, it was me swiping the spoils in the morning…and doing a near sprint away in case we were reprimanded for being such hooligans. What a wuss.


So, with the fig memory flooding back, I got an almighty craving that had to be sorted. To The Google I went, looking for a quick fix.
I found this recipe, and heard a chorus of angels. OK, that might’ve been tinnitus from the Albanian entry from the Eurovision Semi-Final on Tuesday, but whatevs. I’d found the answer!
I wasn’t completely sold on figs with savoury food. I’m not a fan of raisins in curry..or anything else for that matter, and fruit in my dinner? Bleurch. Not for me thankyouverrymuch. But, feck it, why stick with the safe options all the time? Plus I really wanted to get some dariole moulds!
After pumping an Italian foodie for where to get the best Gorgonzola in Dublin, my plan of action was complete. A race across town to make it to Kitchen Compliments for the moulds before they closed, which they very kindly put aside for me. And then, thankfully just around the corner in Fallon & Byrne, the cheese wasn’t too far away in the 20 deg heat! They didn’t have the Gorgonzola Dolce, but there were two others to choose from..and sample..WOOHOO! The Piccante won out. It is just heaven on its own. They know their stuff at the counter, I tells ya.
Even though you have to make the panna cotta the day before, it’s redonkulously easy and quick to make, so it’s not as fussy and time consuming as it might appear.
I’d never used gelatin before either so was putting all trust in the recipe…and then basically ignored it (rebel without a bleedin’ clue). I put in roughly 20g more cheese and a bit more double cream, because I had it, and I wanted the cheese to really come through. It would have been such a waste if it turned out creamy..with a hint of cheese. Sinful, in fact, sinful!
So, I said my goodbyes to the beautiful cheese and dunked it into the creams to melt down. The gelatin was easy to work with, and not a bit fiddly as I’d expected.

I didn’t think the moulds would be big enough to take the mix, but it worked out on the button-no waste! From start to closing the fridge door, it took less than ten minutes. Totally easy peasy.
 So, all that’s left to do the next day, is toss the rocket leaves with the figs, walnuts, season and drizzle with balsamic and extra virgin olive oil. Warm some bread, and pop out the panna cottas.
On the first attempt, they were a little wobbly for my liking, but held together and tasted FABULOUS (if I do say so myself, ahem).
The pic at the top is round two, after being left in for another night, and it set a lot more. The texture was still the same but it looked better, so no harm prepping it an extra night ahead if it suits you.
Here it is after one day in the fridge..


And another one of the second overnight, which I think works a lot better all round.

Perfect summer dish; easy, quick, tasty and refreshing. Now, to order a crate of Cannonau online.
Come to momma!
Gorgonzola & Port Poached Pear Soufflé
 Edited and re-posted from my old blog Where’s My Parade?!
Originally posted October 2012.
Adapted from Lorraine Pascale’s recipe-not sure which book, I borrowed it from a colleague. I’ll edit when I find out….
Like Sardinia, drinking frequently and arsey faced cats, I have made no secret of my love for Gorgonzola.
Just FYI, in my head I say it in extended Kanye All Caps.
Lets get over-enthusiastic about food together- GORGONZOOOOLLLAAAAA!
Since the Gorgonzola panna cottas can’t be whipped up and eaten right away, I had to look for an alternative for last weekends starter. Gorgonzola soufflé with port poached pears. Mmm and mmmm!
I don’t think I ever made souffle before, and was less inclined after watching lips purse and eyes sparkle when contestants on Come Dine With Me would find one on their hosts menu. ‘Oooh’, they’d say, ‘Risky. It could all go wrong very easily’. And then you’d see a thought bubble above their head of them rocking back and forth cackling wildly at the likelihood that their competitor will flop faster than their souffle.
But since how else are you going to learn unless you practice, it went down on my menu (Snigger. Sorry.).
It was fine to make, although next time I wouldn’t bother with the pears, they added nothing to the dish, despite being well soaked in lovely port. It was a waste of bleedin’ port which bothered me most. Booo…
I’ll put down the measurements as I used it, and note in italics where I’d make changes for next time to see if that works a little better as I was left over with a good bit of mixture and breadcrumbs.
Ingredients
2 Medium Pears, peeled, cored and cut into large chunks. Use 3-4 med. pears. Or none.
150ml (5fl oz) port I used tawny port. Drink it yourself instead.
Salt & freshly ground black pepper
40g (1.5oz) unsalted butter
75g (3oz) bread crumbs Two slices of bread did the job, although half that would suffice.
40g plain flour
150ml (5fl oz) milk
75g (3oz) GORGONZOOOLAAAA
1tsp mustard powder
5 eggs, separated
Squeeze of lemon juice
Equipment
1 large (like, rilly large) soufflé dish, 4 soufflé dishes or 8 ramekins
Put the prepped pears in a pan with the port and black pepper. Add a little water if the pears are not fully covered. Bring to just under the boil and turn down the heat so only a couple of bubbles break the surface of the liquid. Cook until the pears start to go soft, remove from the pan from the heat and leave the pears to infuse for a few minutes.

Preheat the oven to 200 deg C/ 400 deg F/ Gas Mark 6 and place a baking tray in the oven. You need direct bottom heat to give the eggs a good upward boost in the oven.
Prep your souffle dish/es/ ramekins. Butter the sides and base, in an upward motion on the sides. Tip some breadcrumbs into each mould and tip the moulds to coat the insides. The breadcrumbs will give a crispy crunchy crust.

Remove the pears from the port and put them into the dish/es, distributing evenly.
Separate your eggs. Put the whites into a mixing bowl and the yolks can go into a cup or whatever will hold them until you need them.
Heat the butter in a medium pan (what I call medium you may not, just be aware that you need space to fold in the whipped egg whites later in this dish) over a low heat, add the flour and stir to combine well. Remove the pan from the heat and gradually add the milk, bit by bit, stirring all the time. if it all goes in at once, it will get lumpy. If it goes lumpy, whisk like a mad yolk (dadum dum tishhh) to get rid of the lumps.
Turn up the heat until the mixture is boiling and cook for a further 2-3 minutes. The sauce will begin to thicken. Remove the pan from the heat and add the GORGONZOOOLAAA. Cut up a bit and nom as you go along. Pour a bit more port. G’wan ye good thing ye.

Also add the mustard powder and season with salt and pepper. Season more than you think you’ll need as the eggs will dilute the flavour a little.

Add the egg yolks and stir well.

Add a squeeze of lemon to the egg whites and whisk. Start slowly and then pick up speed. The whites should be whisked to a shiny and stiff peak (lawd have mercy) so it will hold their shape in the bowl. Add one big spoonful of whites to the cheese mix (called a panade, ooh, foncy) to loosen it up and make it easier to fold in the rest. Using a large metal spoon, slowly fold in the egg whites keeping as much air in the soufflé as possible.

Remove the hot baking tray from the oven and place the dish/es on it, and pour in the mix. Run a finger along the edge of the dish/es to ensure the mixture is not coming over the side.
Use a palette knife to level the top of the soufflé so it rises evenly.
Bake immediately, 20-25 mins for a large soufflé dish, 10 minutes for the small ones.

Try not to open the oven door while it’s baking or it might collapse.

So, that’s it. Pretty easy. It was a touch too liquid-y in the centre for my liking and there was a good bit of mix and breadcrumbs left over. I’ll make individual ones later and see how much further that stretches and will edit the ingredient amounts if needed. I served it with salad…and more port.


I give this recipe three Grumpy Cats out of five

Alright, edit time-
There was enough left over for three little soufflés. Much nicer without the pears.
Goes great with a glass or two of port, if you insist, like.
Insist, damn you. *shakes fist*


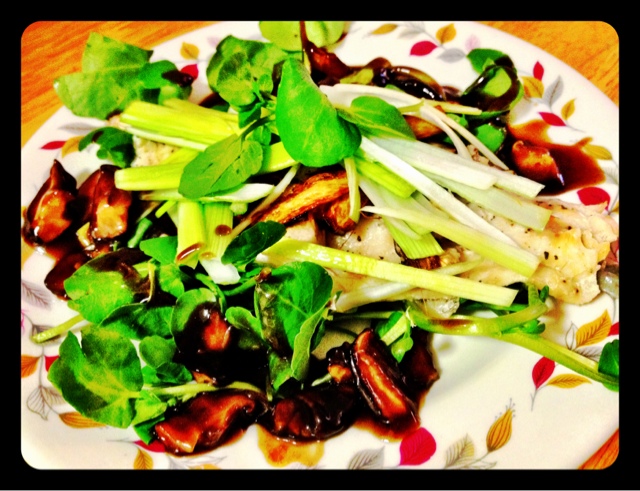
Cantonese Sea Bass With Shitake Mushrooms, Leek & Ginger
 Edited and re-posted from my old blog Where’s My Parade?!
Originally posted June 2012.
This is the dish I made in the first audition on Masterchef Ireland 2012. It got one yes, and one no, meaning I had to come back for a second audition. Dylan horsed into it. Good man.
Taken from the fabulous Clean & Lean Diet Cookbook.
Feeds 4
Ingredients
4 x 100g fillets sea bass
5cm Piece of ginger, thinly sliced
50g Shitake mushrooms, chopped
2 leeks, julienned
150ml organic chicken stock (or half a Knorr stock pot)
30ml oyster sauce
30ml soy sauce
30ml sesame oil
50g baby mustard cress
Method
I adapted the method as I don’t have a steamer.
Top the fillets with the sliced ginger and half of the mushrooms.
Steam the fish for 7 minutes, or for 15-20 mins, en papillote (fancy way of saying in a tin foil/ parchment paper parcel) in the oven at around 200 deg. until the fish is nearly cooked through
Remove the ginger from the fish and shallow fry in vegetable oil for 3-4 minutes until golden and crisp, then drain on kitchen paper.
Let the fried ginger cool for a few minutes, then add the leek and some of the ginger back to the fish, seal up the parcel and cook for a further 3 mins if steaming, or until cooked through in the oven.
In a hot pan, reduce the chicken stock (I couldn’t source organic stock in time), oyster sauce, soy sauce and the remaining mushrooms until thick. Add the sesame oil. Mmm, mmm!
Transfer the sea bass to the plates with some baby cress and pour/ spoon the sauce around the fish.
This was so simple to make. From start to finish, it was about an hour, but would be a lot quicker if you stick to the method properly..unlike some, ahem…
Also, of note for those in teeny tiny apartments like me, there’s minimal prep so you don’t need much space. Best of all, it’s very low odour. In fact, all that was left was a fresh smell of ginger and leek. Yum!
3 Minute Chocolate Mug Cake
 pic via fitsugar.com
Edited and reposted from my old blog Where’s My Parade?! Originally posted December 2011.
I’ve wanted to try this for a long time but with wildly varying reviews of how good it is, I figured why cause more wash up for something that could possibly be pretty manky.
I’m not a huge chocolate cake fan, but sometimes, only a slice of fluffy cocoa cakey goodness will do. Or in this case, a mug of.
It ended up with hasty research for a quick and easy chocolate cake to get my fix. And tah-daaaaaaaaaah….microwave choccie cake in the time it takes you to boil a kettle of water.
The measurements below are what I figured would work (although I lobbed in the liquid stuff in hoping for the best), and here’s how it turned out.
Makes 1 big-ass mug cake (it’s a technical term), or 2 decent cakes in separate mugs/ cups
Dry ingredients-
2 oz flour
1 oz sugar
1 oz cocoa powder
Wet ingredients-
1 egg
3 tablespoons milk
3 tablespoons melted butter (or 30g/ 1 oz melted for 15 secs in the microwave)
Baileys Biscotti for flavouring-I used about two runs around the bowl
Unfortunately, I didn’t have chocolate chips. They’re not essential but would have broken up the texture nicely.
Method:
Mix your dry ingredients in a separate bowl. I did this originally because I didn’t believe it would only fit into one mug, it does, but you won’t get to mix it properly in the mug once the wet ingredients go in.

Then add your egg, and mix it until it’s all fairly binded. Add the milk and melted butter and mix until it forms a batter. Add the flavouring
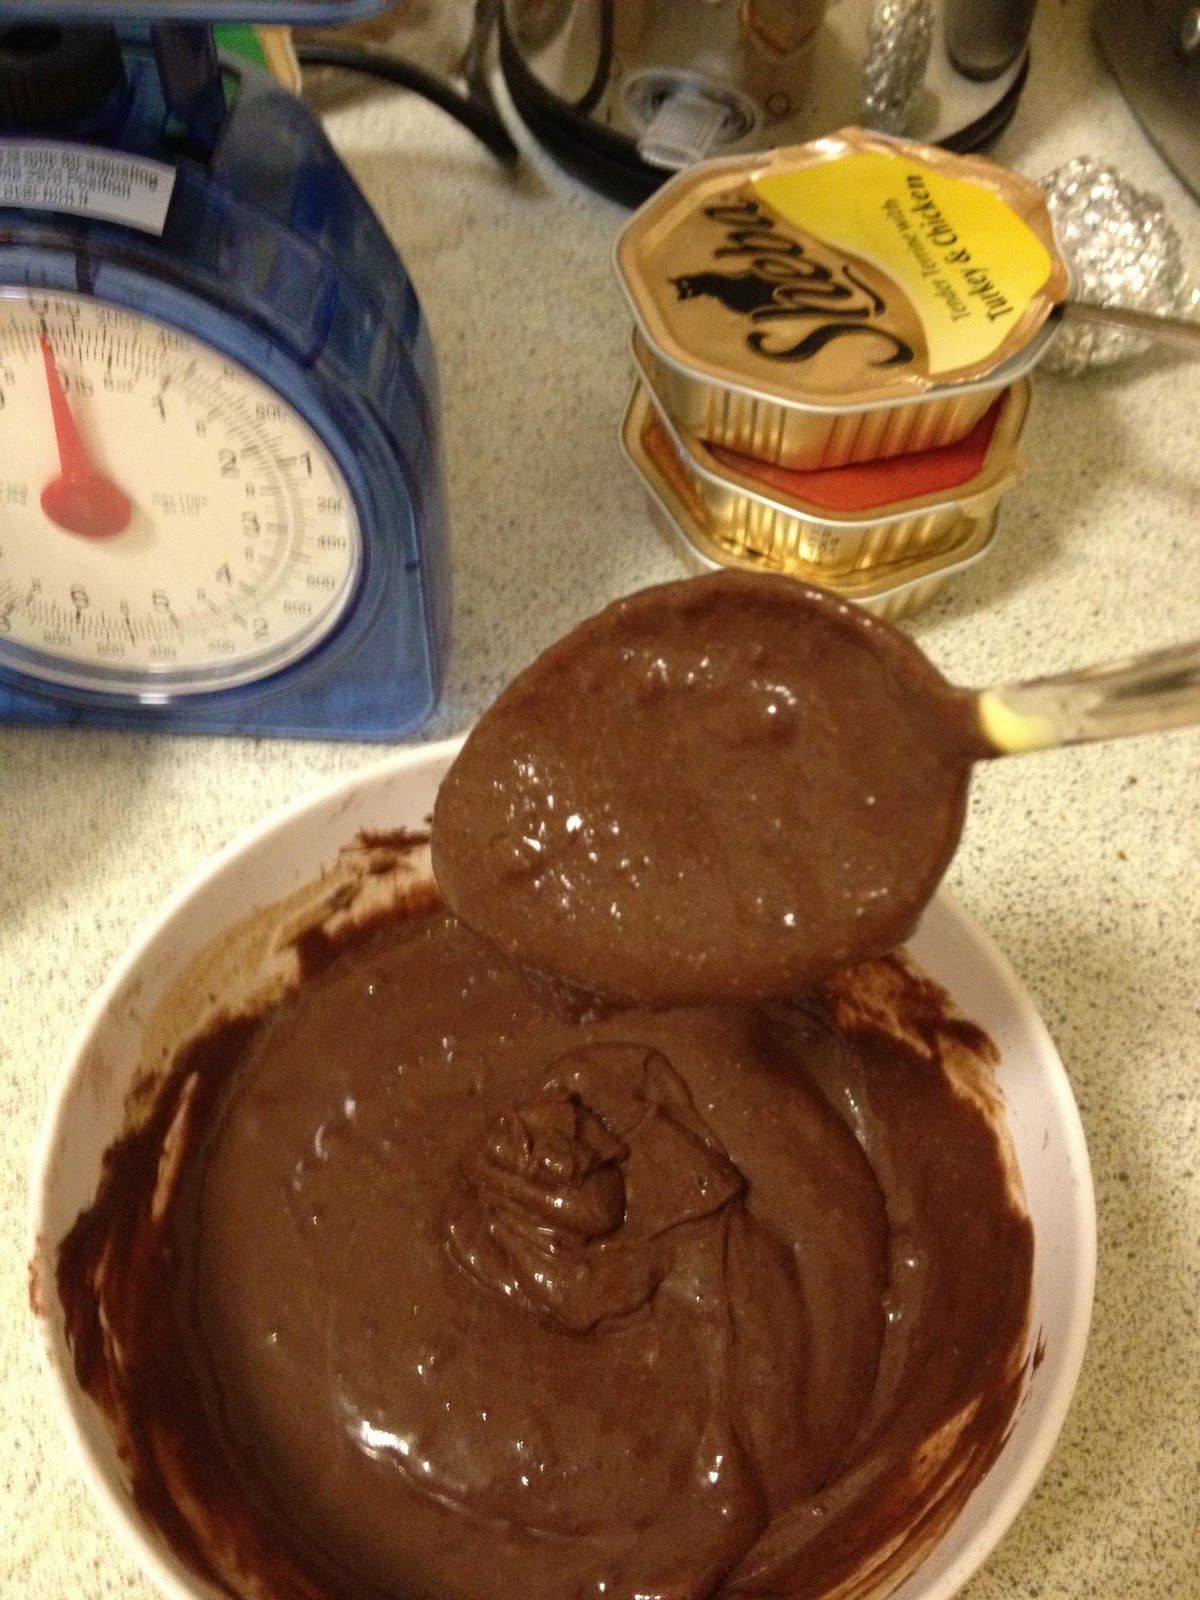
Pour into your microwave proof mug, or two microwave proof mugs/ cups

Pop it in for three minutes. My microwave is supposed to be 850w but it acts like it’s more 1000w. Keep an eye on it while it’s going, in case your cup or microwave gives different results. There’s no point trying to do something the lazy way if it means something blows up or spills over and causes more cleaning, boooooo!

Glossy, mmmmm!
It’s quite dense inside, but has loads of flavour and is rich enough for even the biggest chocoholic!
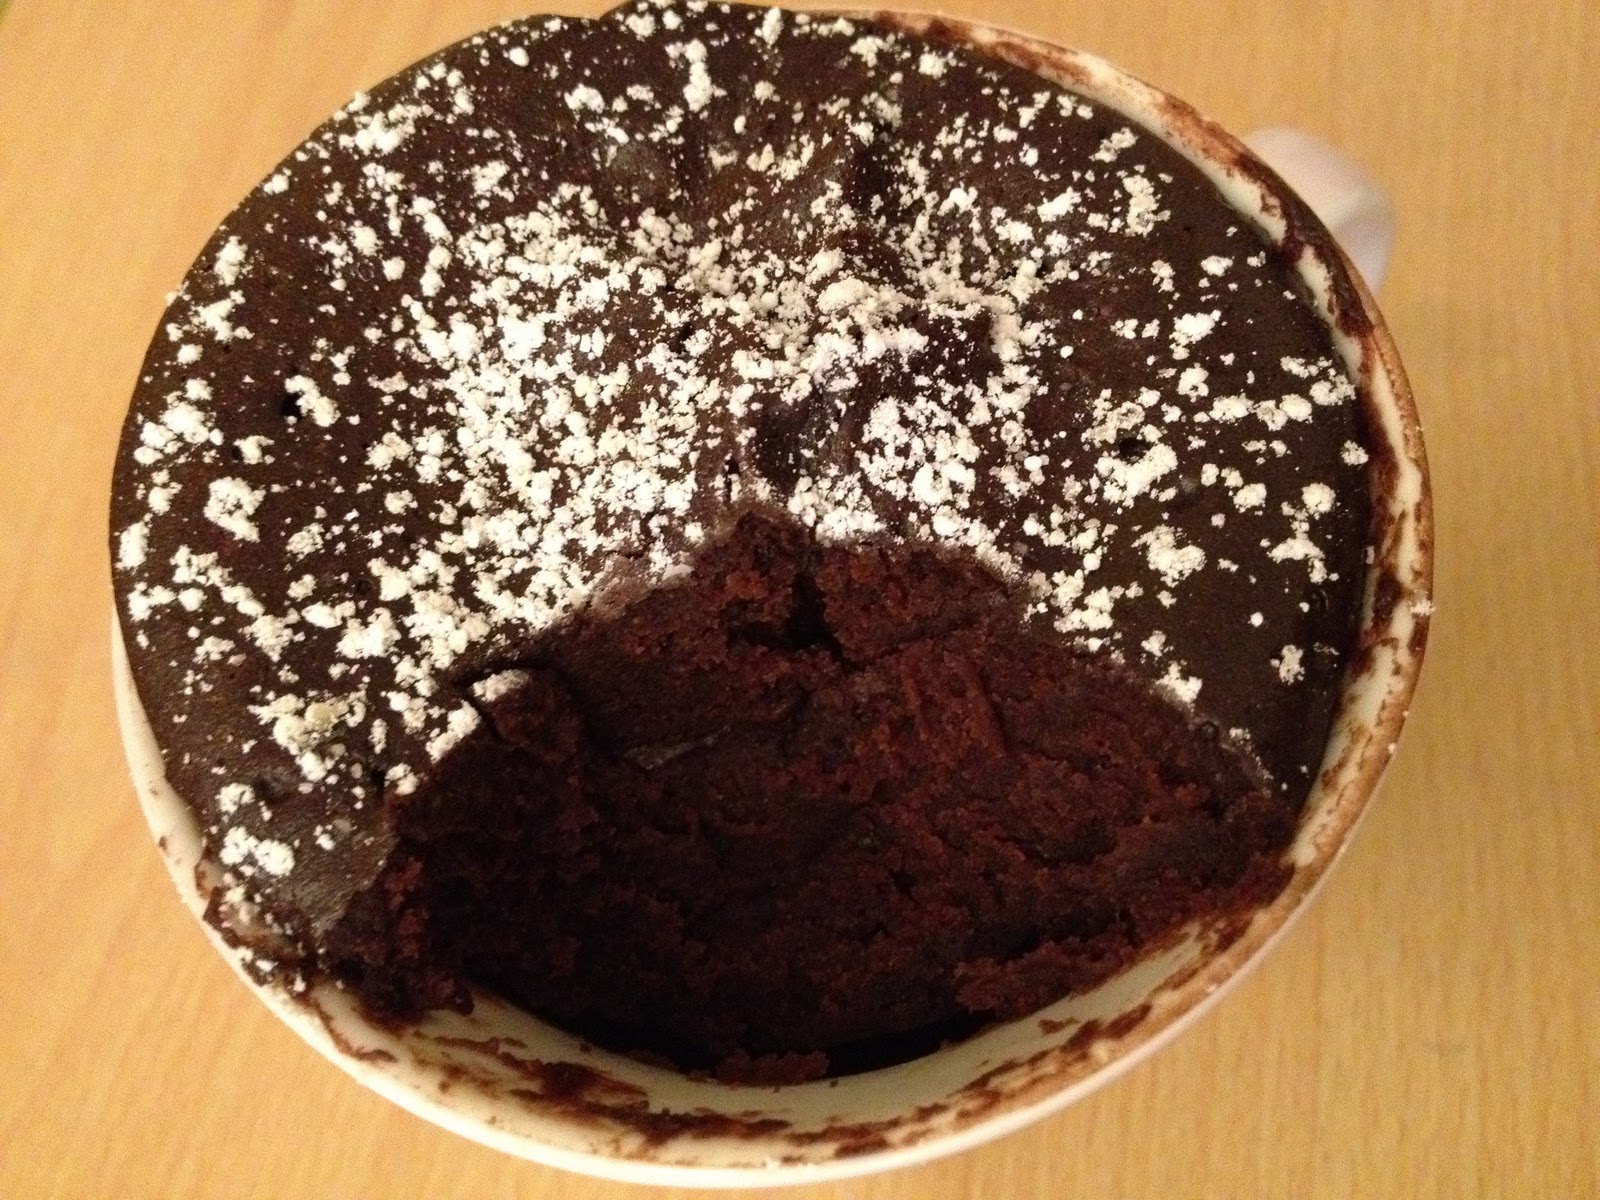
Next time, I’d use chocolate chips, split the mix between two mugs and serve with ice cream, other than that..

